Even if you are very familiar with the printer model that you have purchased it can be difficult when Windows uses an unconventional name for that printer. Plus, if you have used other printers on your computer, the one that you want might have a very similar name to another one you’ve used, which only adds to the confusion. Luckily you can change the name of a Windows printer so that it’s easier for you to select it in the future.
How to Switch a Printer Name
Our guide continues below with additional information on how to change a printer name in Windows, including pictures of these steps. This Windows 7 printer offline guide will show you some other troubleshooting options that you can utilize if you are running into issues with your printer. It’s possible that you have more than one printer installed on or connected to your computer. If you have ever gotten a new computer or used your computer in a different place, then you may have had reason to print to a different computer. Windows will not delete that printer when it is no longer visible to your computer in case you ever need to print to it again. Unfortunately, this can make it confusing when you need to print a document but aren’t sure which printer is the correct one. One helpful way to manage this confusion is by renaming your printer. This lets you specify the name of your printer with something that is easier to identify. (I personally like to use the physical location of the printer, or some other characteristic of it that is easy to remember.) You will then be able to select the printer by its new name whenever you want to print to it. If you need to make international calls from your mobile phone, then our dial assist iPhone article can give you some information about a setting that might make that difficult.
How to Change the Name of a Printer on a Windows 7 Computer (Guide with Pictures)
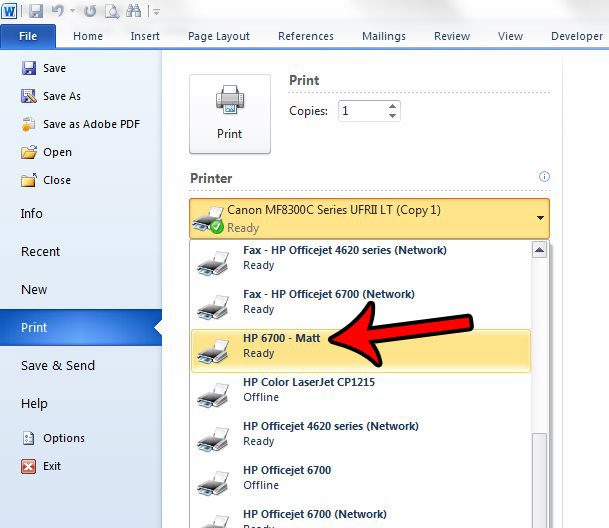
The steps in this article were performed on a Windows 7 computer. Note that changing the printer name in this manner will also change how that printer is displayed in lists of available printers in the applications on your computer. If the printer name does not update in an application that is currently open, you may need to quit and restart that application.
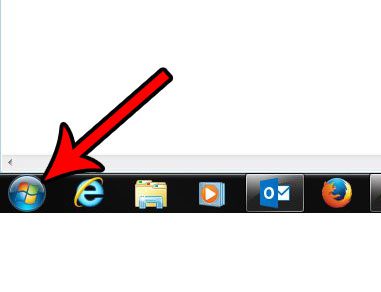
Step 1: Click the Start button at the bottom-left corner of the screen.
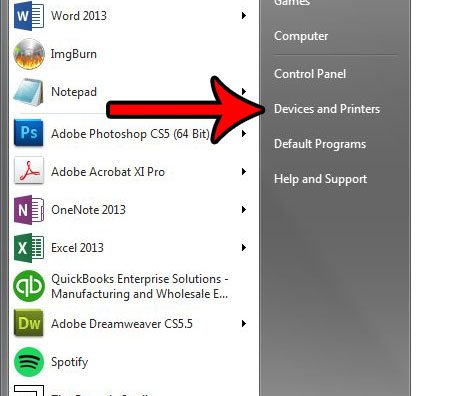
Step 2: Click the Devices and Printers option in the right column of this menu.
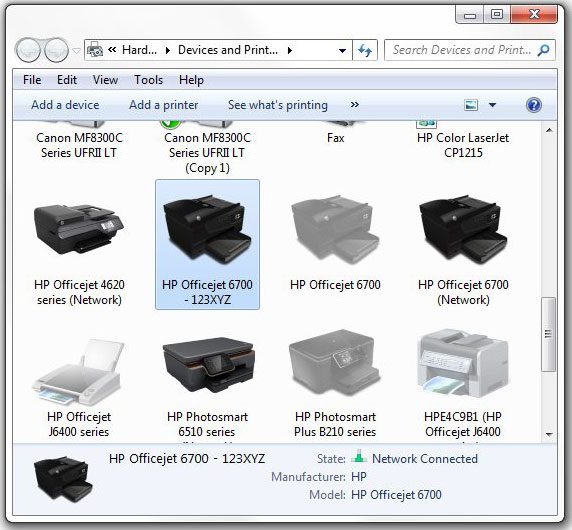
Step 3: Scroll down to find the printer that you want to rename.
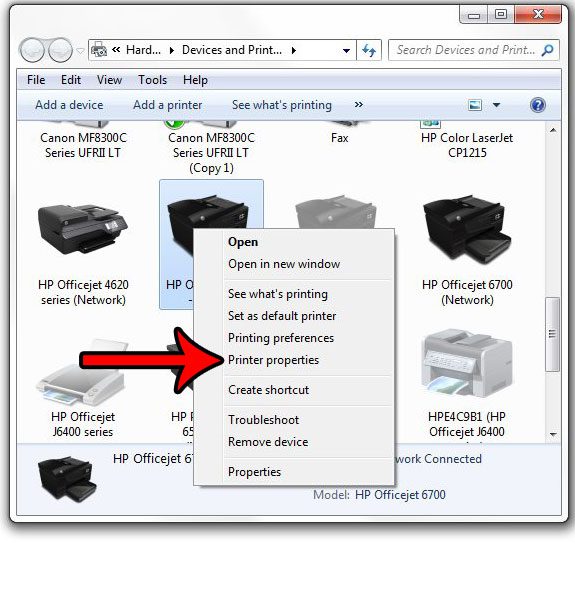
Step 4: Right-click the printer, then click the Printer Properties option.
Note that this step is a cause of confusion for many people, as there is a Printer Properties and a Properties option on this menu. You need to click the Printer Properties option.
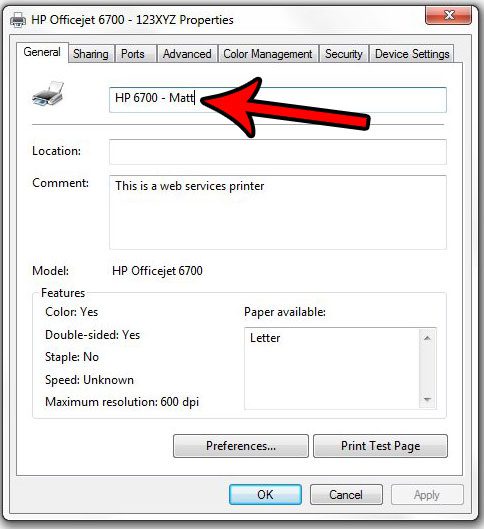
Step 5: Click inside the printer name field at the top of the window, delete the current printer name, then enter the new printer name. Click the OK button at the bottom of the window when you are done.
Now that you know how to change a printer name in Windows you will be able to fix problems that you were having when attempting to select the correct printer in your applications. You can then open a program, like Microsoft Word, and go as if you were about to print a document. You should now see the printer listed with its new name. If not, you may need to restart the program and open it again for the change to take effect. Are you having trouble with print jobs that are stuck in your print queue? Learn how to manage the print spooler in Windows 7 to find a way to fix frustrating issues that can arise with your printer.
Additional Sources
After receiving his Bachelor’s and Master’s degrees in Computer Science he spent several years working in IT management for small businesses. However, he now works full time writing content online and creating websites. His main writing topics include iPhones, Microsoft Office, Google Apps, Android, and Photoshop, but he has also written about many other tech topics as well. Read his full bio here.
You may opt out at any time. Read our Privacy Policy
