But there are other reasons that you might want to use closed captioning on a Roku Premiere Plus, and it may even be your preferred way to watch content on the device. Our tutorial below will show you how to change a setting so that you can enable closed captioning on the Roku Premiere Plus by default.
How to Turn On Subtitles on the Roku Premiere Plus
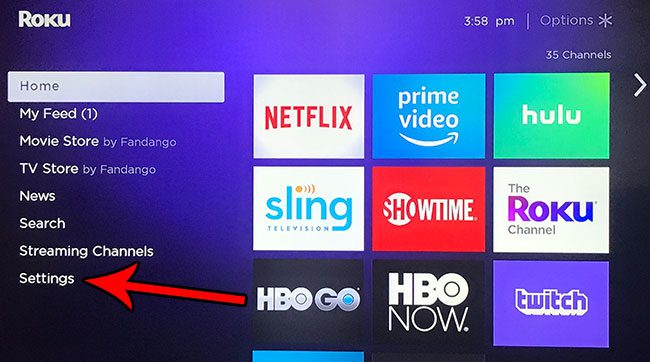
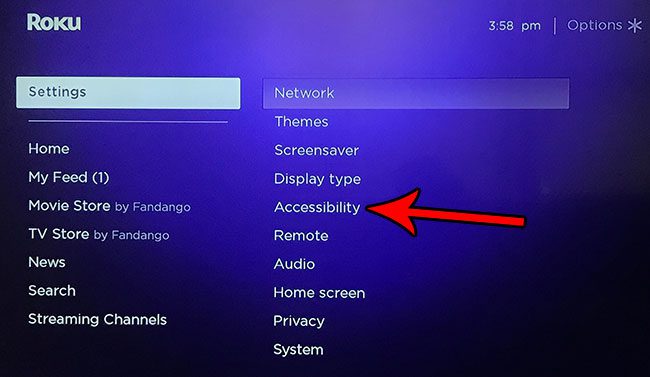
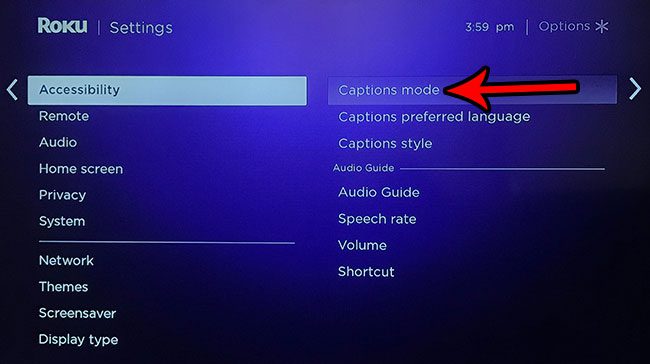
The steps in this article were performed on a Roku Premiere Plus, but will work on several other Roku models as well. Note that once you complete these steps and enable closed captions on the device, any streaming channel that you watch which supports closed captioning will have them enabled. Step 1: Press the Home button on your Roku remote, then choose the Settings option from the left menu. Step 2: Choose the Accessibility menu item. Step 3: Select the Captions Mode option. Step 4: Choose the On Always option. Now if you go and open a streaming channel that supports closed captioning, such as Netflix or Hulu, then you should see subtitles at the bottom of the videos you are playing. If you don’t want to turn on subtitles by default for every channel, then you might instead prefer to turn on subtitles from within the individual app. The exact method for doing this will vary from app to app but, typically, if you pause a video, or press up on the remote control, you should see a subtitle or settings option where you can find the closed captioning option. After receiving his Bachelor’s and Master’s degrees in Computer Science he spent several years working in IT management for small businesses. However, he now works full time writing content online and creating websites. His main writing topics include iPhones, Microsoft Office, Google Apps, Android, and Photoshop, but he has also written about many other tech topics as well. Read his full bio here.
You may opt out at any time. Read our Privacy Policy


