How to Make a Header in Excel 2013
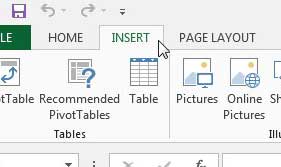
The header in Excel 2013 is separate from the grid of cells that is displayed on your screen and is often not even visible. But it will be visible when the spreadsheet is printed, which is often the only reason that information is added to the top of a spreadsheet. So continue reading below to learn how to insert a header in Excel 2013. Step 1: Open your spreadsheet in Excel 2013. Step 2: Click the Insert tab at the top of the window.
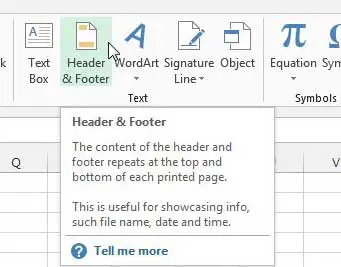
Step 3: Click the Header & Footer button in the Text section of the ribbon at the top of the window.
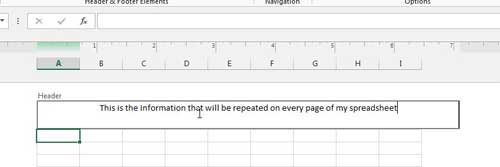
Step 4: Select the region of the header area in which you want to include your information, then type the header information.
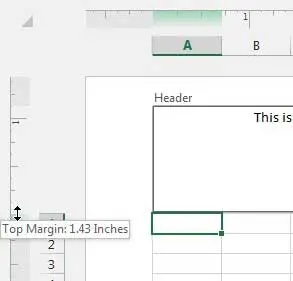
Note that you can increase the height of the header by dragging the bottom border of the top margin on the ruler at the left side of the window.
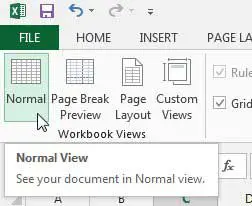
You can return to the normal view by clicking inside any of the cells, clicking the View tab at the top of the window, then clicking the Normal button in the Workbook Views section of the window.
Do you need an image editing program like Adobe Photoshop, but you’re put off by the high price? Consider purchasing a subscription card to lower the initial price. If you’re printing your spreadsheet in Excel 2013 and it is extending to multiple pages, then a great way to make it easier to read is by printing your header row on every page. Click here to learn how. After receiving his Bachelor’s and Master’s degrees in Computer Science he spent several years working in IT management for small businesses. However, he now works full time writing content online and creating websites. His main writing topics include iPhones, Microsoft Office, Google Apps, Android, and Photoshop, but he has also written about many other tech topics as well. Read his full bio here.
You may opt out at any time. Read our Privacy Policy
