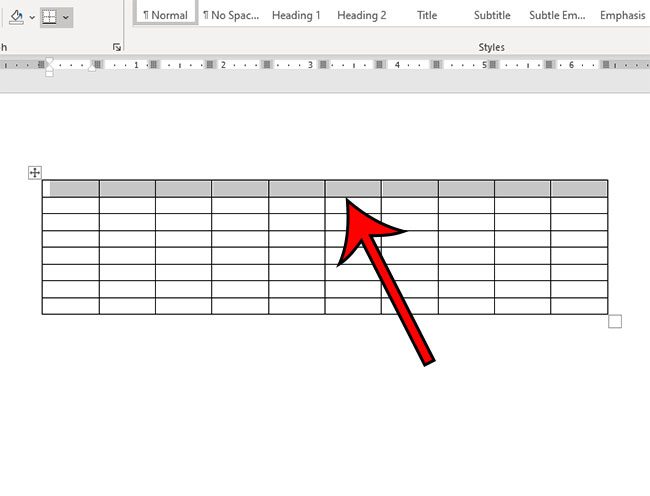
Perhaps the best way to do this involves merging a few cells so that they are bigger than the rest of the table cells. You can read more about how to merge Word table cells in our tutorial below.
How to Merge Cells in Word Table
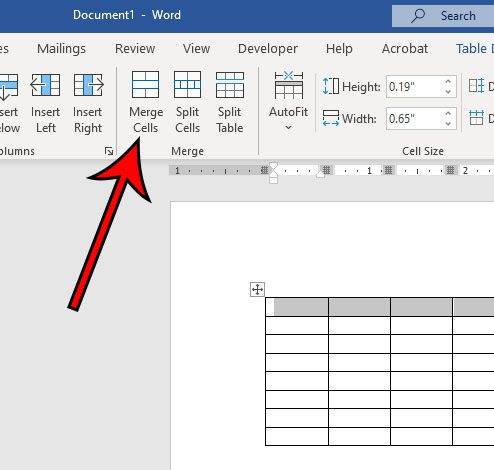
Our guide continues below with additional information on merging cells in Microsoft Word tables, including pictures of these steps. The layout of a table that you create in a word processing application like Microsoft Word or Google Docs may not always conform to the default structure. If you need to have a larger cell in your table then you can merge cells in Microsoft Word tables by selecting the cells in the table, choosing the Layout tab, then clicking the Merge Cells button. The steps in this guide are going to show you more about how to merge two or more cells in a table that you have created in your Microsoft Word document. If you have worked in one of the other popular Microsoft Office applications called Excel, then you may already be familiar with the variety of table tools and options that can exist for things like spreadsheets and tables. In fact, you may have even merged cells in Microsoft Excel before, which likely led you to look for a way to merge cells in Word. Fortunately, you have the ability to select cells in a Microsoft Word table, then take those selected cells and combine them into one large single cell. Our guide below will show you how to merge cells in Word and help you achieve your desired table formatting. Once you have the layout of your table figured out, you might need to know how to center text in Word if you want your content in the middle of the page.
How to Merge Table Cells in Microsoft Word 2016 (Guide with Pictures)
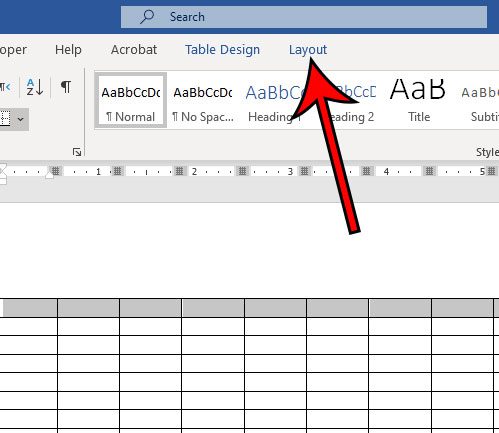
The steps in this article were performed in the Microsoft Word for Office 365 version of the application, but will also work in other recent versions including Microsoft Word 2016 and Microsoft Word 2019. Alternatively, you can right-click on the selected table cells, then choose the Merge Cells option that appears on that shortcut menu. You could also create a new document and add a table to it. I am merging the top row of my table in the image above, as indicated by the gray fill color appearing in those cells. If after you select Merge Cells you decide that it isn’t providing the layout that you were looking for, simply press Ctrl + Z to undo it, or follow the steps in our section below to undo merging table cells. Now that you have completed the how to merge cells in Word table steps you might need to know how to unmerge those cells in case you run into a problem with it later.
How to Unmerge Cells in Word 2016
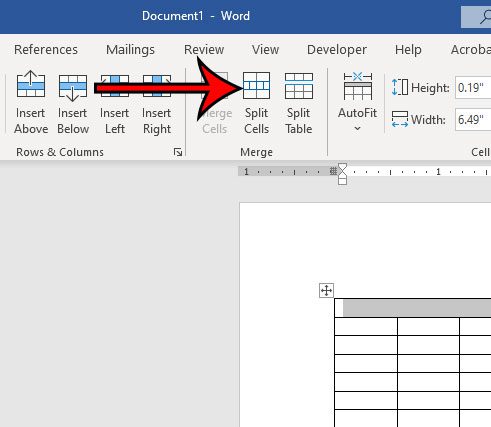
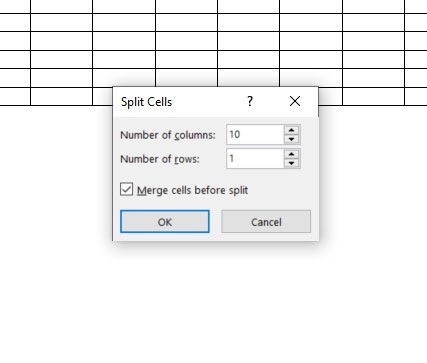
Now that you know how to merge cells in Word tables, it’s also helpful to know how to undo that merge in case you accidentally merge the wrong cells, or discover that you need to change your layout. Word handles this with a Split Cells command tool. This allows you to select the merged cells in your table, then specify the number of rows or columns that the merged cells should be split into.
Step 1: Select the merged cell that you wish to split into multiple cells.
Step 2: Click the Layout tab at the top of the window, to the right of Table Design.
Step 3: Click the Split Cells button in the Merge group section of the ribbon.
Step 4: Choose the number of rows and the number of columns for the split, then click the OK button.
Our tutorial continues below with additional discussion on table cell merging in Microsoft Word.
More Information on How to Merge Two or More Cells in Word 2016
Now that you know how to merge table cells and split table cells in MS Word you should be able to achieve nearly any table layout that your Microsoft Word document requires. For even more table tools in Microsoft Word, you could take advantage of the Split Table option that also appears in the Merge section of the ribbon. That option will split your table into multiple tables based on where your cursor is located within the table. One of the options in the “Merge” section, when you are working with tables, is the “Split Table” option that we discussed above. But you may notice that there isn’t the opposite option, which would be to merge tables in Microsoft Word. Fortunately, you can merge two separate tables in a Microsoft Word document, although it requires you to take a different approach. When you hover over the bottom of the two tables that you want to merge, a button will appear at the top-left of the table. If you click that button and drag the bottom table towards the top table you will see an outline of the bottom table. Once the top of that table aligns with the bottom row of the top table you can release the mouse button to merge the two tables. Note that this can be a little tricky to get right. If you don’t drag the bottom table close enough to the top table then there will be a little space between the two tables. If you drag it too far above the bottom row it will put the bottom table inside of one of the cells in the top table. If you wind up with one of those situations you can always just press Ctrl + Z on your keyboard to undo the attempted table merge and try again. Find out how to add space between your Word table cells if it seems like the data in your cells is too close to the data in surrounding adjacent cells.
Additional Sources
It’s possible, however, that you could be having trouble with this selection. To select more than one table cell in Microsoft Word you need to click on the first cell, then hold down the mouse button as you drag in the direction of the other cells that you want to merge. Alternatively you could click on the top-leftmost cell that you want to merge, then hold down the Shift key and click the last cell that you want to merge. When you select Split Cells will allow you to split a cell into more cells. Once you click that button it will open a Split Cells dialog box where you can specify the number of cells to generate from that single cell. Splitting table cells is kind of the opposite of merging cells, but it can be just as useful in helping you to create the table layout that you need. Simply click in a cell in the row that you would like to be the top row of the new table, then click the Split Table button. You should now have two tables, with the bottom table starting with the row with your selected cell.
After receiving his Bachelor’s and Master’s degrees in Computer Science he spent several years working in IT management for small businesses. However, he now works full time writing content online and creating websites. His main writing topics include iPhones, Microsoft Office, Google Apps, Android, and Photoshop, but he has also written about many other tech topics as well. Read his full bio here.